NEW Glue Pulling Systems- In Stock!
NEW Glue Pulling Systems- In Stock!
BODYSHOP
WORKSHOP
WELDING
TOOLS
SAFETY

How to Install SPR Rivets Into a Car Body Panel
August 29, 2024 3 min read 1 Comment
What is an SPR rivet
SPR or Self Piercing Rivets are a process used to join two or more layers of material without a pre-drilled or punched hole. The action of the rivets piercing the material forces it into the shaping anvil behind, forcing the legs of the rivet to splay. This with the correct force applied gives the required strength.
SPR rivets can be used to join similar or dissimilar materials together Always ensure the correct depth of the rivet and the correct fitment anvils to ensure to obtain the correct strength of the joint.

Installing and removing Self Piercing Rivets and Flow Form Rivets is now required by many manufacturers in the aftermarket repair of damaged body panels.
If you're an OEM ( manufacturer approved) shop this can entail the very expensive purchase of a manufacturer-approved SPR gun such as the Jaguar approved Avdel ESN50 or the TKR Universal Riveting System PNP 90. These are just a couple of the expensive options for approved vehicle body repair shops.
Not Approved
If your not an approved shop then things are a little easier on your pocket for equipment that can perform as good if not better than manufacturer-approved.
Inserting Self Piercing Rivets, for example, is the same process no matter what tool you use whether it is approved or not.

What Pressure
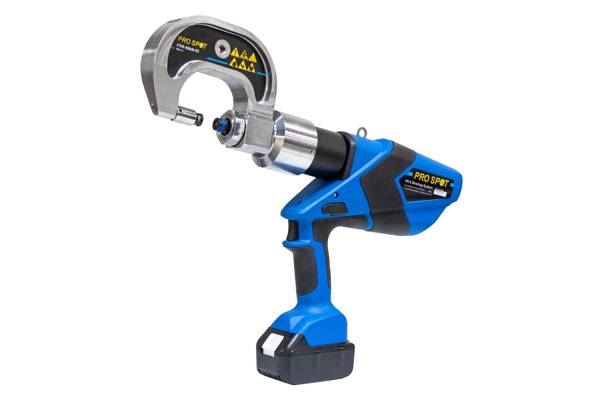
Firstly the rivet tools can either be pneumatic/hydraulic or battery hydraulic but they both work the same as they both have a central push piston able to give a squeeze pressure of between 5 and 10 tonnes.
Some of the early tools were 5 tons but as manufacturers moved on to harder steels and aluminium panels, greater squeeze force is now required. Most now recommend a minimum of 8 ton. The pressure can be controlled using a regulator so as to give the correct force for each type of rivet.
Always observe the manufactures recommended squeeze pressure to ensure correct joint strength.
Below is a gauge chart for RAP (SPR) and RFF ( Flow Form) rivets.

SPEED AND PRESSURE CONTROL
The user can adjust manually the speed of the actuator as well as rivet installation pressure according to the type of material in order to avoid distortion.
Many tools have pressure adjusters so that you can obtain the correct squeeze pressure.

Select Your Anvils
The Anvils come in sets and are matched to the size of the SPR.
The front anvil has a magnet on it so that the SPR Rivet can be placed centrally.
The rear anvil forms the shape and allows the legs of the rivet to spread so forming the locking action.
Place the correct sized SPR Rivet on the magnet, place over the joint to be joined and squeeze together.


During each riveting process, make sure that the matrix - and the rivet itself - are laid out on the metal sheets to assemble. It is important to put the punch support in place in order to form a 90° angle.


Keep pressing till either the riveter stops or in some cases the riveter reaches the set pressure and releases.
Finished Appearance

The finished appearance to the rear of the plate should be totally circular with no pop through form the rivet. The rear flat of the rivet should match the size of the front.

The front of the finished rivet should be flush with the material. If you can see a small gap then the rivet hasn't been squeezed into the rear "former" anvil correctly.
This can also happen if the rivet shaft selected is longer than the thickness of the material to be joined. It can also happen if the incorrect "former " anvil is selected.
If you see a mark as shown in the picture above then you have applied to much pressure and you are now squeezing the body panel.
A coorect fit is the rivet head is flush with the panel and no markings are seen on the panel itself. This is a good guide. Otherwise obtain manufacturers prefered squeeze pressure by manufacturers methods.
If you require any help or more advice then please contact us on 0161 223 1843 or use the chat bot here and speak directly to an engineer.
References
https://www.stanleyengineeredfastening.com/fasteners/self-piercing-rivets
1 Response
Leave a comment
Comments will be approved before showing up.






Lee
August 05, 2025
Hi I’m doing panel
Work on a 2015 rangerover that has SPR rivets however I’m replacing the panel with an already used panel. The panel has holes we’re the rivets once were can these rivets still be used as the hole doesn’t need to be pierced. Or what’s the alternative