
Mastering the Art of MIG Welding: A Comprehensive Guide for Novice Metal Maestros
Introduction to MIG Welding
What is MIG welding?
MIG welding, short for Metal Inert Gas welding, is a popular welding process that utilises a continuous wire electrode to join metals together. It works by creating an electrical arc between the wire electrode and the workpiece, which generates intense heat and melts the metal. This you will hear in the form of an explosion. That would generally be it, but for the fact that we have a wire feed unit that then replaces the blown wire with a fresh piece. This fresh piece of wire again shorts and blows and is again replaced.

The confusing part is everyone calls it MIG welding, when in fact we haven't used MIG welding for over 25 years! You see we now use “active” gases when welding. This is why the correct name is MIG/MAG welding or depending on what gas is on the welder it's either a MIG welder or a MAG welder. We will explain the gases later on.
Just to confuse you more, another term is GMAW- Gas Metal ARC Welding. This term is generally used in the USA.
Why is it popular among beginners?
One of the primary reasons why MIG welding has gained immense popularity among beginners is its relative ease of use compared to other welding techniques. Unlike stick or TIG welding that requires precise control and manual dexterity, MIG welding allows for a more forgiving approach.
The wire electrode automatically feeds into the weld pool at a consistent rate, simplifying the process for beginners who may struggle with maintaining a steady hand motion or coordination. Moreover, MIG welding offers versatility in terms of materials and thicknesses that can be welded.
Whether you're working with stainless steel, aluminium, or mild steel, MIG welding provides excellent results across various applications. Additionally, it can handle thicker materials more efficiently than other methods while maintaining high productivity levels.
Advantages and limitations of MIG welding
MIG welding boasts several advantages that contribute to its widespread use not only among beginners but also in professional settings. First and foremost, it enables faster welding speeds compared to traditional methods like stick or TIG welding. The continuous feeding of wire electrodes allows for rapid deposition rates without frequent interruptions for electrode changes.
Furthermore, MIG welds are known for their cleanliness and aesthetically pleasing appearance due to the shielding gas that prevents oxidation and contamination. This makes MIG welding ideal for applications where appearance matters, such as automotive bodywork or furniture fabrication.
However, MIG welding does have its limitations. For instance, it may not be suitable for working in windy or outdoor conditions since the shielding gas can easily disperse, compromising the weld quality.
Additionally, while MIG welding excels at joining thicker materials, it may not provide the same level of precision and control as TIG welding when working with thinner metals. Special techniques are needed to weld thinner material such as car body panels. A question i get asked a lot is "why do i blow holes when MIG Welding"? and i try to answer the special technique in that post.
MIG welding is a versatile and beginner-friendly technique that utilises a continuous wire electrode and shielding gas to create strong and visually appealing welds.
Its ease of use makes it an attractive choice for those new to welding while still providing excellent results across various materials and thicknesses. Despite its limitations in certain conditions or applications requiring precision, MIG welding remains a go-to method for many welders due to its speed, productivity, and overall reliability.

Understanding the Equipment
MIG Welder Components and Their Functions
Alright, let's dive into the nitty-gritty of MIG welding equipment. If you want to start your welding journey on the right foot, it’s essential to understand the various components of a MIG welder and how they come together to create those strong and seamless welds. So, grab your helmet and let's get started!

Power Source
The power source is the heart of any MIG welder. It supplies the electrical energy needed to create an arc between the workpiece and the welding wire. Today there are two types:
- Transformer
- Inverter
Transformer power sources have been around since early 1949 and are generally what you may find in the marketplace. They tend to be very reliable and can last many many years.
Inverter Welders are electronic and can also be lighter than a transformer MIG welder. Think of an inverter welder as a large amplifier like you would find in a music system.
In MIG/MAG welding the power source supplies the voltage and the current is determined by the wire feed speed and arc length.
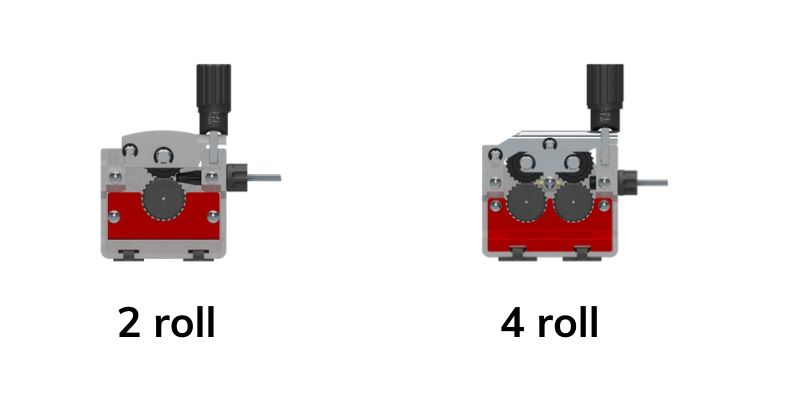
Wire Feeder
The wire feeder is responsible for feeding a continuous spool of welding wire through a liner in the torch towards the contact tip ready for arcing. It plays a vital role in maintaining a consistent flow of consumable wire during the welding process. The speed at which the wire feeds into the gun can be adjusted according to your specific needs – faster for thicker metals or slower for thinner ones.
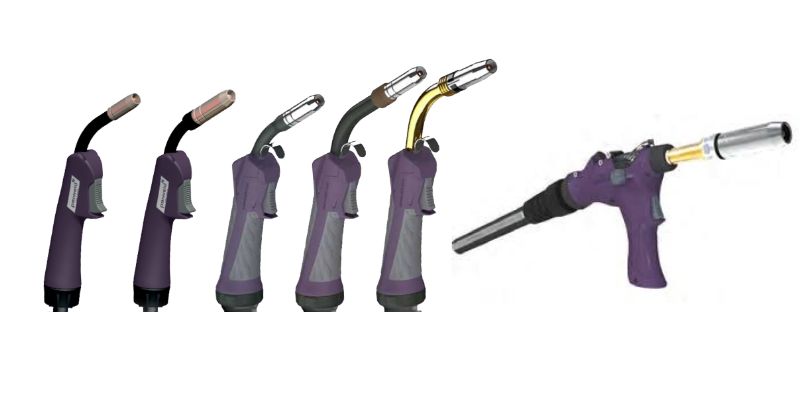
Welding Gun
Ah, here comes everyone's favourite part - wielding that mighty welding gun! This handheld torch is where all the magic happens.
The welding gun consists of several key parts, such as a trigger mechanism, contact tip, nozzle and diffuser. When you pull that trigger (safely positioned behind your protective helmet), it initiates an electric arc between the wire electrode and workpiece metal. Torches are graded in current carrying capacity and go from 120A to 350A in standard guises. Remember to check our 5 things before you start welding to ensure everything is good for you to lay down a bead.
Torch Liner
The torch has a number of important parts that you need to be aware of. Firstly is the liner.
A MIG torch liner is an essential component in MIG welding that acts as a conduit to guide the welding wire through the MIG gun to the contact tip. It helps ensure smooth and consistent wire feeding, preventing issues like wire burn-back, bird-nesting, and erratic wire feeding. There are different types of MIG torch liners available based on factors such as the the wire to be used and diameter of that wire. Here are the different types of MIG torch liners:
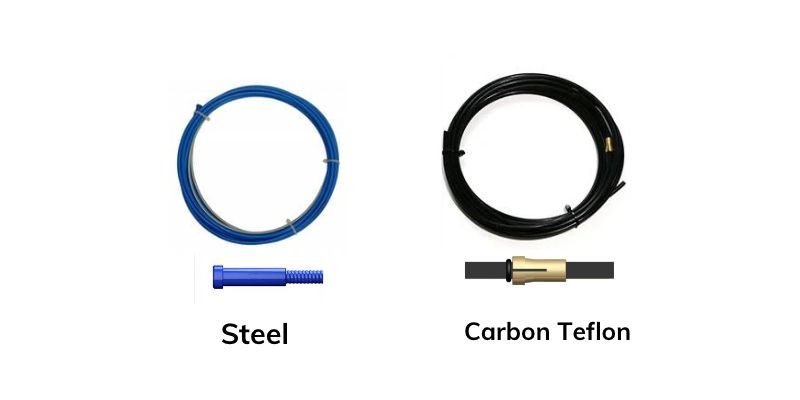
1. Steel Liners: Steel liners are commonly used for welding mild steel. They provide good rigidity and flexibility, ensuring proper wire feeding and preventing wire feed problems. Steel liners are suitable for air-cooled torches and can handle both low and high-temperature welding.
2. PTFE Liners: PTFE (polytetrafluoroethylene) liners are recommended for welding aluminium. They have a low coefficient of friction, allowing the aluminium wire to feed smoothly through the liner without sticking or jamming. We recommend Carbon Teflon Liners to PTFE as they are more rigid and less susceptible to kinking
Correct selection of the MIG torch liner is crucial to prevent wire feed problems and ensure optimal welding performance. The smoother the wire feed the smoother the arc will be. Change your liners often and in the case of teflon, very often.
Contact Tip
The contact tip
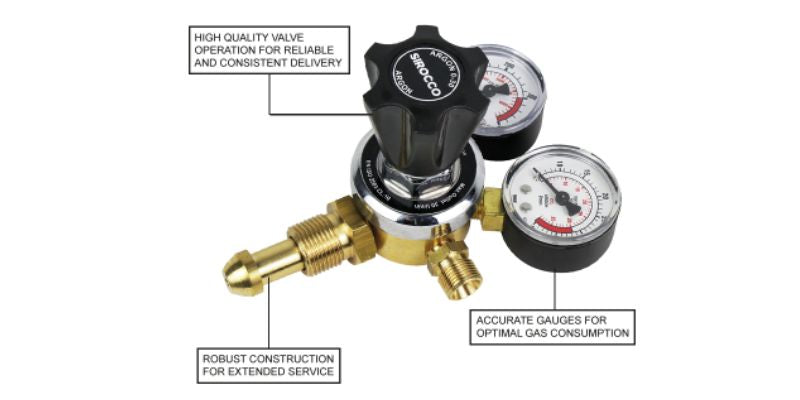
Gas Cylinder and Regulator
No need to hold your breath! The gas cylinder and regulator are here to provide a protective shield for your welds. In MIG welding, the most commonly used shielding gas is a mixture of argon and carbon dioxide. As mentioned before we now tend to use “active” gases such as 95-5 which is a mixture of 95% argon and 5% Co2. Different gas suppliers have different mixtures but they all essentially do the same thing, they not only shield the weld pool from the atmosphere they also do something to the weld pool, be this creating extra heat or cleaning the pool. They are then deemed active!

The gas cylinder holds this mixture under pressure, while the regulator controls the flow rate, ensuring a consistent flow to protect your weld pool from atmospheric contamination. A correct flow rate for MIG MAG welding isi 10-14 LPM ( litres Per Minute). Set your gauge to this before you start
Now that you have a good understanding of the main components of a MIG welder, you're ready to take on the world of metal fusion!
Remember, each piece plays a crucial role in delivering excellent welding results. So, familiarise yourself with your equipment, make friends with your power source, wire feeder, welding gun, and gas cylinder - they're about to become your partners in crime as you master the art of MIG welding!
Safety Precautions
Personal Protective Equipment (PPE)
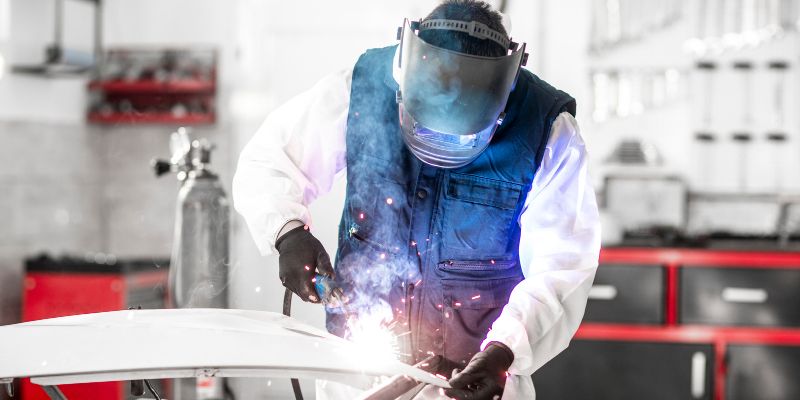
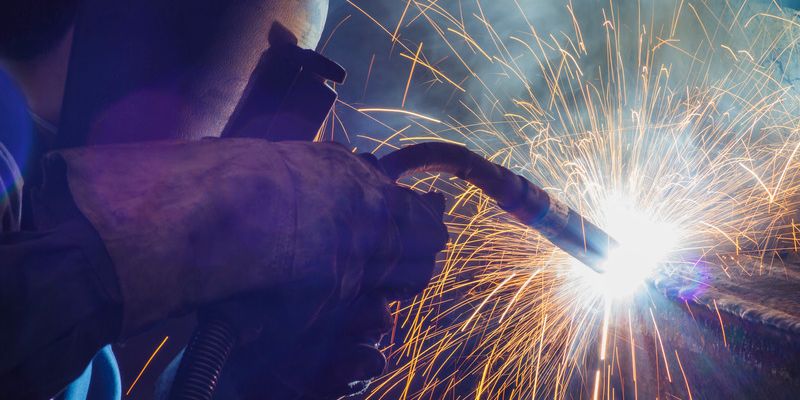
When it comes to MIG welding, safety should always be a top priority. To ensure your well-being during the welding process, it is crucial to wear the appropriate personal protective equipment (PPE). Remember we are dealing with hot molten metal and the MIG Process in dip Transfer mode can create what we call spatter. This is in the form of liquid sparks that can shoot out quite a distance, that being said nobody can call themselves a real welder until they have had spatter in your ear drum or down your boot!
PPE acts as a shield against potential hazards like sparks, spatter, and harmful fumes. It is essential to equip yourself with the right gear before starting any welding project.
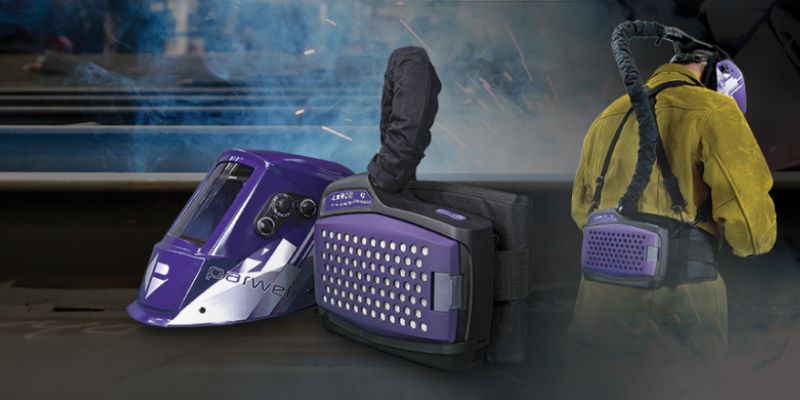
Welding Helmet with Auto-Darkening Lens
One indispensable piece of PPE for MIG welding is a welding helmet with an auto-darkening lens. This nifty device protects your eyes from the intense light generated during the welding process. The auto-darkening feature is especially beneficial as it instantly adjusts the lens shade according to the arc brightness, ensuring optimal visibility while reducing eye strain.
hing materials, putting you at risk of burns or injuries. Opt for flame-resistant materials such as cotton or wool that are designed to extinguish sparks quickly.
Additionally, wearing gloves specifically designed for welding will protect your hands from heat, sparks, sharp edges on metal pieces, and potential electrical shock from accidental contact with live parts. Look for gloves made from durable leather or other fire-resistant materials that provide both dexterity and protection.
Respiratory Protection If Necessary
While not always required in every workshop setting, respiratory protection is an important consideration for certain welding environments. When working with materials that produce harmful fumes and gases, such as galvanised metals or toxic coatings, wearing a respirator becomes crucial. Respiratory protection options vary based on the level of airborne pollutants.
Disposable filtering face-piece respirators (FFRs), also known as dust masks, provide basic protection against particulate matter. If you are working in an environment with more significant fume production or hazardous gases, consider using a half-face or full-face mask with replaceable cartridges designed to filter specific contaminants.

Look for FFP2 Fume masks if you want full protection. The trouble with wearing these types of masks under a welding helmet is that they can cause you to steam up the inside of the lens from your exhaled breath through the valve. If you need to wear respiration then its better to wear proper fume extraction welding helmets
Remember, your health and safety are paramount while engaging in MIG welding. By wearing the appropriate personal protective equipment like a welding helmet with an auto-darkening lens, flame-resistant clothing and gloves, and respiratory protection if necessary, you can minimise potential risks and focus on perfecting your welding skills.
Setting Up Your Workspace
Choosing the right location for welding
When setting up your workspace for MIG welding, it's important to choose the right location. Find a space that is well-ventilated and away from flammable materials. Ideally, you should work in an open area or a garage with good airflow to prevent the accumulation of harmful fumes. Also be aware that a draughty area could effect your welding gas flow.
Avoid working near curtains, papers, or any other objects that could easily catch fire. Additionally, ensure that there are no nearby combustible liquids or gases that could pose a safety risk.
Preparing a clean and well-ventilated area
Before you begin welding, take the time to prepare a clean and well-ventilated area. Remove any clutter or debris from your workspace to minimise trip hazards and improve overall safety. Clean the surface where you'll be placing your workpiece to ensure optimal weld quality.
It's also essential to have adequate ventilation in your workspace. Opening windows or using fans can help disperse fumes and keep the air fresh while you're welding.
Securing your workpiece
Properly securing your workpiece is crucial for successful MIG welding. The last thing you want is for your project to move around while you're trying to make precise welds.
Ensure that your workpiece is securely clamped or positioned in place using appropriate fixtures or jigs before firing up the welder. This will give you stability and control throughout the process, allowing you to focus on creating high-quality welds without worrying about movement.
Selecting the Right Materials
Types of metal suitable for MIG welding
MIG welding works well with various metals such as carbon steel, stainless steel, and aluminium. Carbon steel is commonly used for general fabrication projects due to its affordability and versatility. Stainless steel offers excellent corrosion resistance, making it ideal for applications where durability is essential.
Aluminium is lightweight and widely used in automotive and aerospace industries. It has special properties that make it quite hard to weld using a mig welder and you also need to setup your torch correctly as well. Pulse Inverter welders are now preferred for aluminium welding. Understanding the type of metal you're working with will help you determine the appropriate settings, wire, and shielding gas required for a successful weld.
Determining appropriate wire diameter and gas mixtures
To achieve optimal weld quality, it's important to select the right wire diameter and gas mixtures for your specific project. The wire diameter is determined by the thickness of the metal being welded. Thicker materials typically require thicker wires to ensure proper fusion (1.0-1.2mm).
When it comes to shielding gases, they are used to protect the weld pool from atmospheric contamination. Common shielding gases include a mixture of argon and carbon dioxide or argon with small amounts of oxygen or helium, depending on the material being welded.
Basic Welding Techniques
Proper body positioning for stability
Maintaining proper body positioning while welding is essential for stability and control. Stand with your feet shoulder-width apart, knees slightly bent, and maintain a comfortable stance throughout the process.
Distribute your weight evenly between both feet to enhance balance. Position yourself in such a way that allows you easy access to your workpiece while maintaining good visibility of both the joint being welded and your welding gun.
Setting UP Your MIG Welder
We get this question asked a lot, and how do I set up my MIG welder? The increase of digital inverter MIG Welders has also made this question more pertinent as display panels have become more busy with lots of settings and flashing lights. This question then can be broken down into two parts, Standard or Synergic MIG welders.
Let's look at these separately and explain what the settings are and how to set up your MIG welder. Here we explain how to set up a MIG Welder for both a transformer and Inverter MIG welder.
Gun angle, travel speed, and distance from the workpiece
The angle at which you hold your welding gun can greatly impact weld quality. For MIG welding, a slight backward tilt (around 10-15 degrees) is generally recommended to ensure good penetration without excessive spatter or burn-through. Tilting the torch and running the wire towards your face enables you to observe your weld pool and the corner of your eye can observe the travel. Therefore always try to push the weld pool, drag welding may be preferable in certain positions.
Arc length is also important as pushing the torch towards the material creates more heat and drawing back reduces. When learning set your torch at a fixed distance of 10-15mm and stick to this for the length of the weld. This will give you more consistency.
What is a weld?
Think of a weld as lots of circles joined together. A weld is a circle, if you just arced up and didn't move the torch you would create an circular molten pool that gradually gets bigger and bigger the longer you stay.
So what you need to do when you start welding is decide how wide you want your weld pool or bead to be? Then set your welder up to a setting you think will enable this. This is now made a bit easier with the introduction of inverter welders and synergic settings as the manufacturer has put metal thickness settings into the machine. This will get you near where you need to be.
Then you will arc up and observe the pool and count how long it takes for the weld pool to get to the size,
Additionally, controlling travel speed is crucial as it affects heat input into the metal—too slow may result in excessive heat build-up while too fast may lead to incomplete fusion. Maintaining an appropriate distance between your gun nozzle tip and the workpiece is crucial for consistent arc stability and achieving the desired bead shape.
Starting, stopping
When starting a weld, ensure that your gun nozzle is positioned slightly ahead of the joint to establish proper arc initiation. Gradually move the gun in a controlled motion along the joint, maintaining a consistent travel speed to achieve even and smooth welds. When stopping, make sure to gradually reduce the wire feed before releasing the trigger to avoid excessive spatter at the end of your weld.
Conclusion
Mastering MIG welding requires careful attention to detail and practice, but with proper setup, material selection, and technique refinement, you can become proficient in no time. Remember to always prioritize safety by selecting an appropriate workspace and wearing personal protective equipment.
By choosing suitable materials for your projects and understanding how different variables affect your weld quality, you'll be able to produce strong and aesthetically pleasing welds. Embrace the learning process, experiment with different techniques, and soon enough you'll be confidently creating beautiful welds that will make any beginner proud!
If you need more advice or would like to discuss more then please contact us.

|
Paul Jones Director BWS Ltd, CSWIP Ive been a welding engineer for over 30 years and a welding inspector for 23 years with vast experience of welding and related topics. |
0 comments