Your Cart is Empty


The Theory Of How To MIG Weld On A Car
I teach a lot as you may or may not know, and over the years and I’ve narrowed down the way I inform students and body technicians how to weld vehicles correctly.
Old habits are formed, and for some they are hard to break, especially now that new steels such as AHSS are involved.
Some technicians main criteria when welding the joint is “don’t blow a hole”. Second is distortion of the panel after, as this can determine how much filler goes into the joint, less concern can be for root penetration besides tensile stresses.
MAG welding of a new vehicle steels requires a particular technique, and understanding. Here I will go through my theory of how to perform a weld correctly.

THE WELDING CIRCLE
When you arc up with a welder on a piece of metal, due to the heat involved, a weld pool is formed. This molten liquid forms the shape of a circle ( if the torch hasn't moved) and will grow in size the longer you stay in the same position. We call this a weld "pool".
If you then release your trigger, move the torch, then perform another weld you again form another circle (pool). How far you jump will alter the appearance of your weld and the amount of heat you put into the material, for best results its best to aim for half of the width of the pool.
 .
.
Example - if your weld pool diameter is 8mm, then your pool width is 4mm. Consequently, the required movement between weld pools is 2mm. It is also possible on thinner steels to move up to 4mm and still obtain root fusion with no gaps. Jumping larger than this will reduce heat and the weld will look flatter but you won't achieve full root penetration and have possible gaps between your welds to the rear of the panel.

The "root" is the essential part of a weld, and it's necessary that you fully penetrate here, as this is where welds can break. Cracks can work from the root to the surface under vibration; therefore, it's critical you fully fuse. The problem is that you cannot see the root on a vehicle panel once joined; consequently, a good technique is required to ensure it's fused satisfactorily. Technicians grind down the front of the weld for appearance, and therefore if you haven't welded the root correctly, you're weld will be weak.

Another issue can be observed when grinding. Weld beads are generally harder than the surrounding material. Therefore it's easier to thin the panel at the edge of the weld, again facilitating fractures.
THE IMPORTANCE OF HEAT
A common misconception is the amount of heat in a weld. Welding is all about heat as we need it to melt the material and fuse the joint. The weld pool, therefore, needs to be hot! What we don't want is for this heat to be applied over an extended period of time!
LET ME EXPLAIN
To weld the 0.6/1.0mm vehicle body panels on modern vehicles, we need to weld in a "pulsed" action whereby the technician will press the torch trigger for a second or so and then release it.
This pulsing action is perfectly acceptable and is good practice. However, what you need to think about are hot and cold cycles. For example, when welding its deemed a 'hot cycle' and when not welding it is 'cold'.

I have called this technique 'Tik Tok', and when I teach, I always inform technicians to count whilst they are welding. For example, count how long you press the torch trigger (hot) and how long you release it (cold). This technique will give you the technician/welder a consistency to your weld bead appearance and enable you to learn memory function.

THE TIK TOK TECHNIQUE
Staying in one place at the start lets the weld pool form its circle and get to the size you require. Your first decision is to decide how wide you want your weld bead, and the second is its length. Upon arc up stay still, observe and count how long it takes for the weld pool to get to the size desired. If this takes two seconds, then this is your 'hot' number. Now move your torch half the width of your pool size counting how long you are not welding and weld again. The time between your 'hots' - we call 'colds', and keeping this hot and cold time consistent along the weld bead will give you a more attractive appearance.

The 'cold' time is vital as this reduces the heat applied, reducing distortion and the chances of blowing holes.
Your cold cycle time needs to be two to three times longer than you're hot to reduce distortion in thin steels. In thicker materials, the cold cycle is decreased further, and the hot cycle increased. Manipulation of the torch from side to side isn't required in thin steels unless your panel fit is excessive. Just let the circle grow to cover. Moving whilst welding when pulsing is bad also, this creates teardrops to you weld appearance. Simply stack circles, or as the Americans call it when TIG welding "stack Pennies".
Example-
If the hot is two seconds, then the cold needs to be a four or six seconds. This is what the technician did in the above sample and as you can see his HAZ sone is parallel, meaning his heat input was consistent.
If you stick to this technique, your weld bead will look consistent and uniform.
After a while, you will learn memory function, whereby you automatically do this counting without thinking and move your torch the required distance just by feel.
How fast the weld pool forms depends on the material thickness and what voltage and wire setting you have set on the welder.

Always observe the heat-affected zone (HAZ) and its size and always aim to keep this to a minimum. The HAZ is an excellent indicator of how much heat you are putting onto the material.
The one important factor to be aware of when welding thin steels is not to create your next weld pool whilst your last one is still molten as this creates excessive heat. Let the bright orange of the weld pool dip in colour slightly before producing your next pool this will further reduce the amount of heat, in the weld seam.
We use the welding method for vehicles called 'Dip Transfer' or 'short arc' welding as the welding wire has to 'short' onto the material to explode. The welding wire is essentially a fuse, and when it shorts on the surface of the steel, it creates a short circuit explosion which blows or melts the welding wire, producing heat.
Please take a look at another post I have written on this by clicking here.
This continuous dipping action of the wire into the pool creates a popping effect much like a needle popping a balloon if you let the weld pool get too liquid and it is this that causes you to blow holes
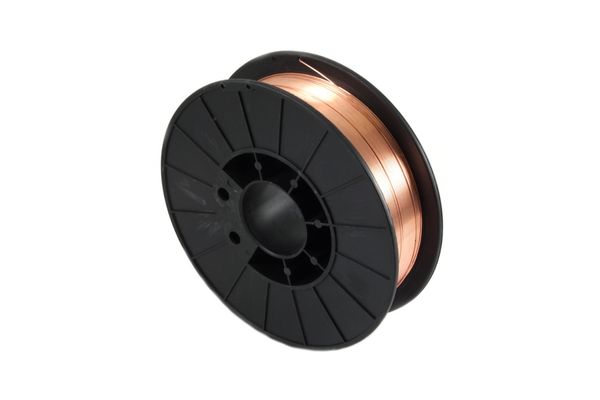
WELDING WIRE SIZE"

The drift towards 0.6mm welding wire was caused by the MIG welding machines of the day having too high an open circuit voltage for welding vehicles. This meant when using 0.8mm, it was a little too hot and hard to control from blowing holes. So 0.6mm was better for car welding?
Yes, the 0.6mm welding wire enabled a lower current to be utilised and here lay the problem, not enough heat is generated in the weld pool to weld the root of the weld. You see the surface of the weld isn’t as important when welding a butt weld, well not as important as the root of the weld and this was the mistake that people made.
The lower welding current meant that the root of the panel wasn’t full melted and more of the weld bead was sat on the top of the panel. Okay, it required a little more grinding off than normal but at least I didn’t blow a hole, right?
The strongest part of a butt weld is the root, that’s the part of the joint to the rear of the panel. Full root fusion is a MUST, but the trouble is on a vehicle you cant look at it after you have welded the joint. Therefore a technician has to rely on experience and his technique to judge has he welded it correctly.
REMEMBER you need heat to weld the root of your joint but what you don't need is the heat to be there for a long TIME.

You can control the heat, not by the voltage switch on your welder but by how long you weld for. The longer you weld the more heat builds up in the pool and on the panel, this and the popping effect of the wire dipping into this pool is the reason you blow holes!
Take your time and increase the length of your cold time between welds to reduce the chances of you causing distortion and ultimately blowing holes.
Move consistent lengths between weld pools and weld for the same length of time each time. This will give a more uniform weld bead appearance that is not only pleasing to the eye but also ensures weld integrity.
This technique can be applied to thicker steels by simply increasing the hot (TIK) part of the weld in relation to the cold (TOK) part of the weld.
Find us on Instagram
Comments will be approved before showing up.


Gregory
November 21, 2022
I have over 20 years of welding experience in various welding process and this site really "nailed it on the head’ with very good technical explanation that is simply explained. Job well done.